
The water’s boiling, and I’m already chopping basil like a madwoman. The smell is fresh and herbal, and I know this Spring Pesto Pasta is gonna be a hit.
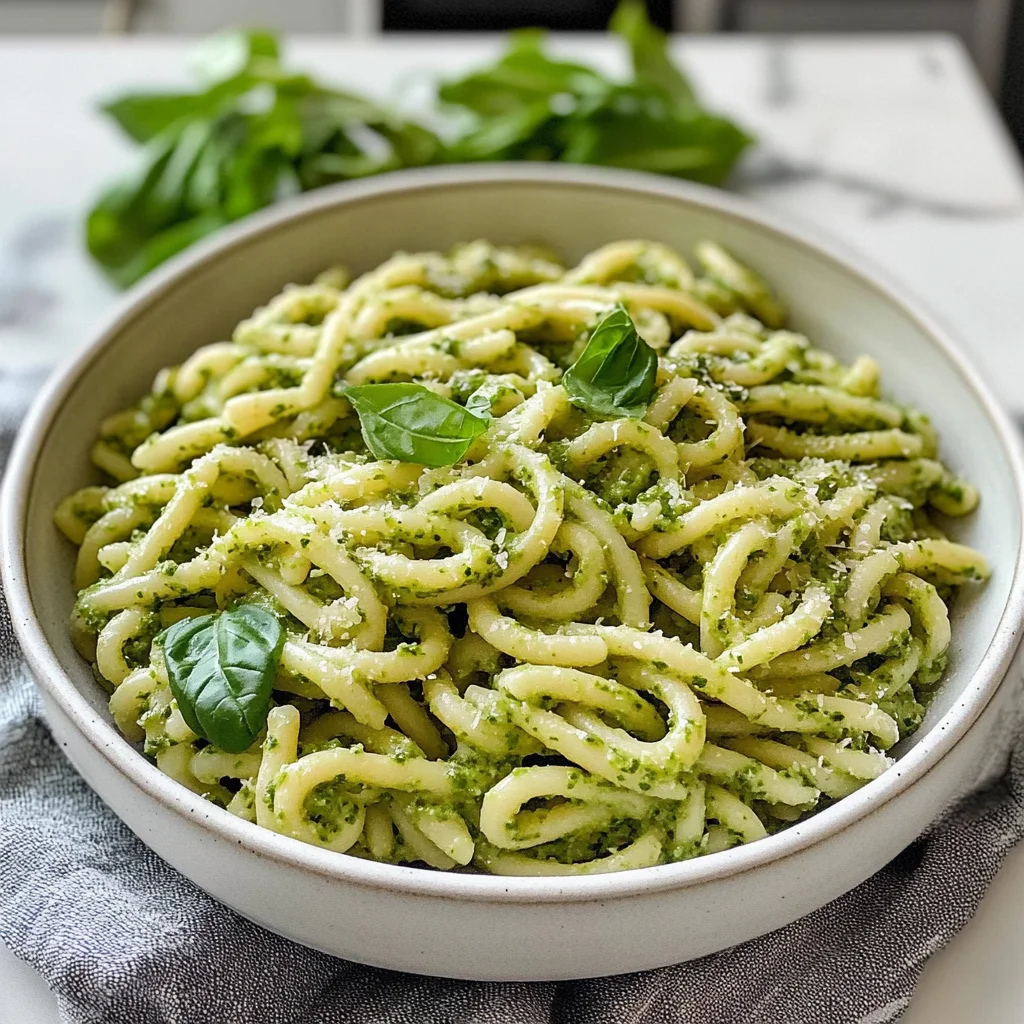
This dish is perfect for those nights when you’ve got 20 minutes and zero plan. Instead of traditional heavy sauces, the bright flavor comes from fresh herbs and toasted nuts, making it lighter yet still satisfying. Plus, you can whip up the pesto in a blender while the pasta cooks (so easy!). It’s dinner on the table before you know it. Quick and delicious!
Why You’ll Love This Spring Pesto Pasta
- Super Easy: Just toss everything together in one pot, and you’ve got a delicious dinner in under 30 minutes.
- Fresh Flavor Bomb: The bright basil and garlic combo really pops, making it feel like spring on a plate (trust me!).
- Crisp-Tender Veggies: The veggies stay perfectly crisp-tender while soaking up all that yummy pesto goodness. You won’t miss the meat!
- Flexible Ingredients: Swap out veggies based on what you have on hand or prefer — it’s super forgiving (but don’t skip the cheese).
- Leftovers Needed: It keeps well for lunch, but the flavor’s best fresh. So eat it all if you can!
Spring Pesto Pasta Ingredients
For the Base:
Pasta (12 ounces) — I love using fusilli for its perfect sauce-hugging spirals.
Olive oil (1/4 cup) — Don’t skimp; it adds richness and helps everything come together.
Pine nuts (1/4 cup) — Toast them lightly for extra crunch and flavor.
Fresh basil leaves (2 cups) — Use whole leaves for a brighter, fresher taste.
Garlic cloves (2, minced) — Fresh is best; don’t even think about garlic powder here.
Parmesan cheese (1/2 cup, grated) — Go for the real stuff; it melts beautifully in this dish.
For the Topping:
Cherry tomatoes (1 pint, halved) — Their juicy sweetness adds a nice pop of color and flavor.
Salt and pepper (to taste) — Adjust to your liking, but start with just a pinch!
(If you’re nut-free, sunflower seeds can work well instead of pine nuts.)
Full measurements in the recipe card below.
How to Make Spring Pesto Pasta
1. Cook the pasta: Bring a large pot of salted water to a boil. Add 12 ounces of fusilli and cook until al dente, about 8-10 minutes, or until you hear it start to dance in the pot.
2. Toast the pine nuts: In a small skillet over medium heat, toast 1/4 cup of pine nuts for about 3-5 minutes. You’ll know they’re ready when they smell nutty and look lightly golden — don’t walk away here!
3. Make the pesto: Meanwhile, in a food processor, combine 2 cups of fresh basil leaves, 2 minced garlic cloves, and the toasted pine nuts. Blend until finely chopped, then drizzle in 1/4 cup of olive oil while blending until smooth and creamy.
4. Add cheese: Now add in 1/2 cup of grated Parmesan cheese to your pesto mixture and pulse again until combined. It should be thick but spreadable (and so good you might want to eat it straight from the bowl).
5. Combine pasta and sauce: Once your pasta’s done cooking, drain it and toss it back into the pot with the pesto sauce. Mix well on low heat for about a minute until everything’s coated with that vibrant green goodness.
6. Add tomatoes: Toss in a pint of halved cherry tomatoes right before serving to add that juicy sweetness we all love! Season with salt and pepper to taste — start light; you can always add more later.
7. Serve it up!: Dish out your Spring Pesto Pasta while it’s warm and enjoy that melty-gooey vibe with every forkful! Exact quantities in the recipe card below.
How to Store Spring Pesto Pasta
- Room Temperature: Don’t leave it out for more than 2 hours. It’s best enjoyed fresh, so if you’re planning on leftovers, pop it in the fridge right away.
- Refrigerator: Transfer to an airtight container for up to 3 days. Just know that the pasta might get a little sticky after a day or two (add a splash of olive oil when reheating to help with that).
- Freezer: Freeze in a freezer-safe container for up to 2 months. The pesto can lose some of its bright flavor and color, but it still works in a pinch.
- Reheating: Microwave on medium heat or warm on the stovetop until it’s steaming hot throughout (you’ll smell that garlicky goodness again!). Stir occasionally to keep it from sticking together.
What to Serve with Spring Pesto Pasta?

It’s light and fresh, but a little acidity or crunch on the side keeps it from feeling too one-note.
- Lemon Garlic Roasted Asparagus: The bright lemon juice adds acidity that cuts through the richness, while the crispy edges offer a nice texture contrast.
- Caprese Salad: The juicy tomatoes and creamy mozzarella provide a refreshing balance of flavors and textures that complement this dish beautifully.
- Garlic Bread: Crunchy on the outside and soft inside, it brings a satisfying texture that pairs well with the pasta’s silkiness (plus, who doesn’t love garlic?).
- Grilled Chicken Breast: A simple seasoning lets the chicken shine; its protein makes this meal heartier without overpowering it.
- Crisp Cucumber Salad: The cool, crunchy cucumbers add a refreshing bite, perfect for cutting through any richness in what you’re eating.
- Balsamic Glazed Brussels Sprouts: Their slight bitterness and tangy glaze balance out the flavors wonderfully (and they roast in about 25 minutes).
- Zesty Lemon Sorbet: For dessert, it’s light and tart—a sweet finish that cleanses your palate after your meal.
- Steamed Broccoli with Parmesan: This veggie not only adds color but also brings a mild nuttiness that works well alongside this dish’s flavors.
Spring Pesto Pasta Variations
Here’s how to play with this recipe and make it your own!
- Lemon Zest Boost: Add the zest of 1 lemon when mixing the pesto for a bright, zesty kick.
- Extra Greens: Toss in 1 cup of baby spinach when you mix everything together for extra nutrition.
- Cheesy Upgrade: Stir in ½ cup of freshly grated Parmesan cheese just before serving for a richer flavor.
- Nutty Twist: Blend in ¼ cup toasted pine nuts with the pesto for an added crunch.
- Creamy Pesto Sauce: Mix in ½ cup of heavy cream when you combine the pasta and pesto for a dreamy sauce.
- Common Substitution: Use 1 cup arugula instead of basil if that’s what you have on hand (trust me, it works).
- Roasted Veggie Addition: Add 1 cup of roasted cherry tomatoes during mixing for a sweet, caramelized finish.
Make Ahead Options for Spring Pesto Pasta
I love making Spring Pesto Pasta ahead of time, especially on busy days. You can prep the pesto and cook the pasta a day or two in advance, then store them separately in airtight containers. The sauce keeps well in the fridge for about 3 days, but I find that the pasta can get a little sticky if left too long (trust me on this). Right before serving, just toss everything together with some fresh veggies or protein for a quick meal. If you want to add cheese, wait until you’re ready to eat to sprinkle it on. Keep it simple and enjoy!
Spring Pesto Pasta Recipe FAQs
Can I make Spring Pesto Pasta ahead of time?
You totally can! Just make the pesto and cook the pasta, but keep them separate until you’re ready to serve. Store the pesto in an airtight container in the fridge, and it’ll stay fresh for about 3 days. When you’re ready, just toss everything together on low heat until warmed through. (But don’t forget to add those cherry tomatoes right before serving for that juicy kick!)
What can I substitute for pine nuts in this recipe?
If you’re nut-free, sunflower seeds work really well as a substitute. They’ll give you that nice crunch without any nut allergy worries. Toast ’em like you would with pine nuts — just watch them closely until they start smelling nutty and look lightly golden. Trust me, it’s a great swap that keeps this dish delicious!
Why did my Spring Pesto Pasta turn out dry?
Ah, that can happen if your pasta absorbs too much water or if the pesto is too thick. Make sure to reserve a bit of pasta cooking water before draining; you can add a splash of it while mixing everything together to achieve that creamy sauce-hugging consistency. If it looks dry, don’t be shy about adding more olive oil or even a little bit of reserved pasta water.
How do I know when my garlic is minced enough?
You want your garlic cloves finely minced so they blend smoothly into the pesto. If they’re small enough that you can’t see big chunks anymore and have released their fragrant aroma (yum!), then you’re golden! If not, just give ’em another quick chop with your knife or pulse a few more times in the food processor until they’re smooth and ready to mingle with those basil leaves.
Final Thoughts on Spring Pesto Pasta
Honestly, what makes this Spring Pesto Pasta worth making is how quickly it comes together without sacrificing flavor. You can whip it up in about 30 minutes, and it’s got that fresh taste from the basil and the richness from the cheese that just feels like spring on a plate. If you’re short on time but still want something satisfying, this is your go-to. Give it a shot and let me know how yours turned out in the comments!