
I’m staring at the empty pie dish, wondering how I let it disappear so fast. No-Bake Easter Chocolate Pie is a total crowd-pleaser, and one slice just isn’t enough (trust me on this).
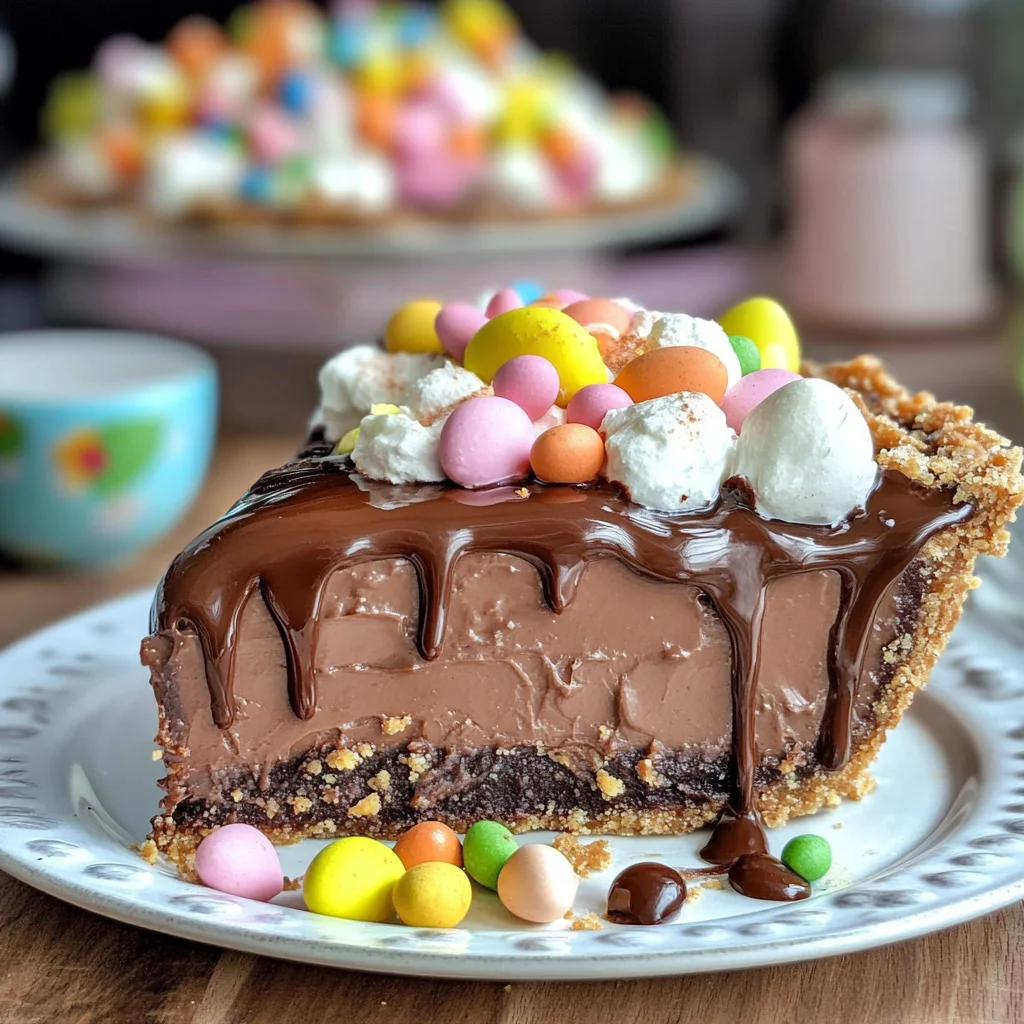
This dessert is perfect for those last-minute gatherings when you need something sweet but don’t have time to bake. You skip the oven entirely, and the filling is as rich and creamy as it gets. Plus, no fuss with egg tempering here! Grab your spoon—you’re gonna want to dig in right away.
Why You’ll Love This No-Bake Easter Chocolate Pie
- Super Easy: Just mix, press, and chill—no baking skills required. You can whip this up in no time!
- Decadent Flavor: The combo of rich chocolate and creamy filling is totally dreamy. It’s like a chocolate lover’s paradise!
- Silky Texture: The filling is melty-gooey with a slight crunch from the crust. It just melts in your mouth!
- Versatile Treat: You can switch out toppings or even add fruit if you’re feeling adventurous (or if mini eggs aren’t your thing).
- Perfect for Parties: It looks fancy but is super simple to make—just don’t forget to give it enough chill time to set right!
No-Bake Easter Chocolate Pie Ingredients
For the Base:
chocolate cookie crumbs (2 cups) — Use Oreo cookie crumbs, or the pie crust won’t hold up right.
unsalted butter (1/2 cup) — Melt the butter completely, or the crust’ll fall apart when you slice it.
For the Filling:
heavy cream (2 cups) — Chill the bowl before whipping cream, or it won’t whip up nice and fluffy.
semi-sweet chocolate chips (1 cup) — Grab Ghirardelli chocolate chips, ’cause cheap ones can taste waxy and gross.
powdered sugar (1/2 cup) — Sift the powdered sugar to avoid lumps, or you’ll end up with a gritty filling.
vanilla extract (1 teaspoon) — Use pure vanilla extract, ’cause imitation’s just not worth the flavor loss.
For the Topping:
whipped cream (1 cup) — Fold in whipped cream gently, or you’ll deflate all that airy goodness.
chocolate shavings (1/4 cup) — Use a vegetable peeler for shavings, ’cause a knife just won’t give you that look.
mini eggs (1/4 cup) — Don’t skip out on Cadbury mini eggs, or the festive vibe just won’t be there.
Full measurements in the recipe card below.
How to Make No-Bake Easter Chocolate Pie
1. Make the Crust: In a mixing bowl, combine 2 cups of chocolate cookie crumbs with 1/2 cup of melted unsalted butter. Press the mixture firmly into a 9-inch pie pan until it’s nice and compact.
2. Chill the Crust: Refrigerate the crust for at least 30 minutes, or until it’s set and feels firm to the touch (you want it to hold up when you slice it).
3. Whip the Cream: Now, in another chilled bowl, whip 2 cups of heavy cream until soft peaks form — it’ll be fluffy and billowy when you’re done.
4. Mix the Filling: In a separate bowl, mix together 1 cup of melted semi-sweet chocolate chips, 1/2 cup of sifted powdered sugar, and 1 teaspoon of pure vanilla extract until smooth and glossy.
5. Combine: Gently fold the whipped cream into the chocolate mixture until fully combined (watch out here — if you rush it, you’ll deflate all that airy goodness).
6. Pour the Filling: Carefully pour your luscious filling into the prepared crust, smoothing out the top with a spatula.
7. Chill Again: Cover your No-Bake Easter Chocolate Pie with plastic wrap and refrigerate for at least 3 hours or until it’s completely set (the center should feel firm).
Exact quantities in the recipe card below.
How to Store No-Bake Easter Chocolate Pie
- Room Temperature: Don’t leave it out — this dish needs to be refrigerated. It won’t hold up well at room temp for more than 2 hours.
- Refrigerator: Store in an airtight container or cover it tightly with plastic wrap. It’ll stay fresh for about 3 days, but the whipped cream might lose some fluffiness over time.
- Freezer: If you want to save some for later, wrap it well in plastic and then foil. It can last up to a month, but the texture may change a bit when you thaw it.
- Reheating: You don’t really reheat a No-Bake Easter Chocolate Pie, but if you want that creamy filling to soften a bit after freezing, let it sit out for about 20 minutes before serving. It should feel cool and slightly softened when it’s ready.
What to Serve with No-Bake Easter Chocolate Pie?
It’s super rich and creamy, so having something with a bit of acidity or crunch really balances it out nicely. Here are some ideas:
- Fresh Berries: The tartness of strawberries or raspberries cuts through the sweetness perfectly. Just rinse them off and serve.
- Minty Fruit Salad: A mix of citrus fruits like oranges and grapefruit with fresh mint offers a refreshing contrast. Prep takes about 10 minutes.
- Chocolate-Covered Pretzels: The salty crunch adds texture that complements the creaminess beautifully. Grab a bag or make your own in under 30 minutes.
- Coffee or Espresso: A shot of strong coffee balances sweetness while waking up your taste buds. Brew a cup right before serving for maximum flavor.
- Vanilla Ice Cream: A scoop on the side provides a cool, creamy texture that feels indulgent but lightens the dish overall.
- Coconut Whipped Cream: Try replacing regular whipped cream with coconut for a tropical twist — just whip it up while the pie sets.
- Lemon Sorbet: This frozen treat is icy and tangy, cutting through richness while adding a fun color contrast to your plate.
- Toasted Nuts: Sprinkle some chopped toasted almonds or hazelnuts on top for added crunch and nuttiness that rounds things out nicely.
No-Bake Easter Chocolate Pie Variations
Here’s how to play with this recipe!
- Mint Chocolate Twist: Add 1 teaspoon peppermint extract when mixing the melted chocolate for a refreshing flavor.
- Peanut Butter Bliss: Fold in 1/2 cup creamy peanut butter into the chocolate filling before pouring it into the crust for a nutty kick.
- Coconut Dream: Mix in 1/4 cup shredded coconut with the chocolate filling for a tropical touch.
- Chocolate Hazelnut Upgrade: Swap half the chocolate chips for hazelnut spread (like Nutella) when melting for a richer taste.
- Berry Burst: Add 1/2 cup crushed raspberries on top of the filling before refrigerating for a fruity surprise.
- Caramel Drizzle: Drizzle caramel sauce over whipped cream just before serving for an extra sticky-sweet finish.
- Mini Egg Surprise: Substitute mini eggs with crushed cookies or candies of your choice in the topping for fun texture!
Make Ahead Options for No-Bake Easter Chocolate Pie
I love making the No-Bake Easter Chocolate Pie ahead of time to take the stress out of the day. You can prepare the crust and filling up to a day in advance, then store them separately in airtight containers in the fridge. Just make sure to cover the pie crust with plastic wrap to keep it fresh. The filling holds well for about 3 days, but I recommend topping it with whipped cream and decorations right before serving—otherwise, the whipped cream can start to lose its fluffiness (trust me on this). So, get ahead on that pie and enjoy your time with family! Don’t forget to chill it.
No-Bake Easter Chocolate Pie Recipe FAQs
Can I make No-Bake Easter Chocolate Pie ahead of time?
Absolutely! This dish is perfect for making a day or two in advance. Just cover it tightly with plastic wrap after it’s set and keep it in the fridge. The flavors actually deepen overnight, so it’ll taste even better. Just remember to add your toppings right before serving to keep everything fresh and pretty (nobody likes soggy whipped cream!).
Why did my filling turn out gritty?
If your filling’s gritty, it’s likely due to not sifting the powdered sugar. Those little lumps can ruin the smooth texture you’re going for. Make sure to sift that sugar before mixing it in with the melted chocolate chips and vanilla extract. When it’s mixed properly, you should have a smooth and glossy mixture that’s almost begging to be poured into your crust.
What can I use instead of chocolate cookie crumbs?
You can try using graham cracker crumbs if you’re in a pinch, but I wouldn’t recommend it for this pie; it might not hold up as well. If you want to stick with chocolate, stick to Oreo cookie crumbs — they give that rich flavor and sturdy base you need for this recipe. And don’t forget to melt the butter completely; otherwise, the crust won’t slice nicely!
How do I know when my whipped cream is ready?
You’ll know your whipped cream is ready when soft peaks form — that means when you lift the whisk out, the cream should hold a peak that gently bends over at the tip. If you whip too long, you’ll end up with butter (yikes!). So keep an eye on it! Chill your bowl beforehand for best results; it’ll help whip up beautifully fluffy every time.
Final Thoughts on No-Bake Easter Chocolate Pie
Honestly, the best part about this No-Bake Easter Chocolate Pie is how simple it is to whip up something that looks and tastes fancy. You don’t even have to turn on the oven, and it saves so much time in the kitchen. Plus, with the creamy filling and chocolatey crust, it’ll totally wow your guests (or just you after a long day). If you’ve been putting this off, tonight’s the night. Let me know how yours turned out in the comments!
No-Bake Easter Chocolate Pie
Ingredients
Method
- In a mixing bowl, combine the chocolate cookie crumbs and melted butter.
- Press the mixture firmly into the bottom and sides of a 9-inch pie pan to form the crust.
- Refrigerate the crust for at least 30 minutes to set.
- In a large bowl, whip the chilled heavy cream until soft peaks form.
- In another bowl, mix together the melted chocolate chips, powdered sugar, and vanilla extract until smooth.
- Gently fold the whipped cream into the chocolate mixture until fully combined.
- Pour the chocolate filling into the prepared crust, smoothing the top with a spatula.
- Cover the pie with plastic wrap and refrigerate for at least 3 hours or until set.
- Once set, remove the pie from the refrigerator.
- Top with whipped cream, chocolate shavings, and mini eggs as desired.
- Slice and serve chilled for a delicious treat.